Level 1 High Power Rocketry Certification
I built a rocket for my level 1 high-power certification in the summer of 2025. I wanted to build this rocket so I could use it for a later level 2 certification flight as well, so I had to design and build my rocket with an L2 flight in mind as well. I also wanted to learn about composites, so early on, I elected to do fiberglass layups to make my fins.
Design:
I started by designing my rocket in the software OpenRocket. I planned on using an Aerotech H550 for my L1 and an Aerotech J270 for my L2; the J motor is considerably heavier, so ensuring stability with both motors was crucial. I followed the general guidelines on model rocket fin sizing and tweaked my fin shape to get to the desired stability. I ultimately chose fins with a root chord of 7 in, tip chord of 1.5 in, a height of 4 in, and a sweep angle of 50 degrees.
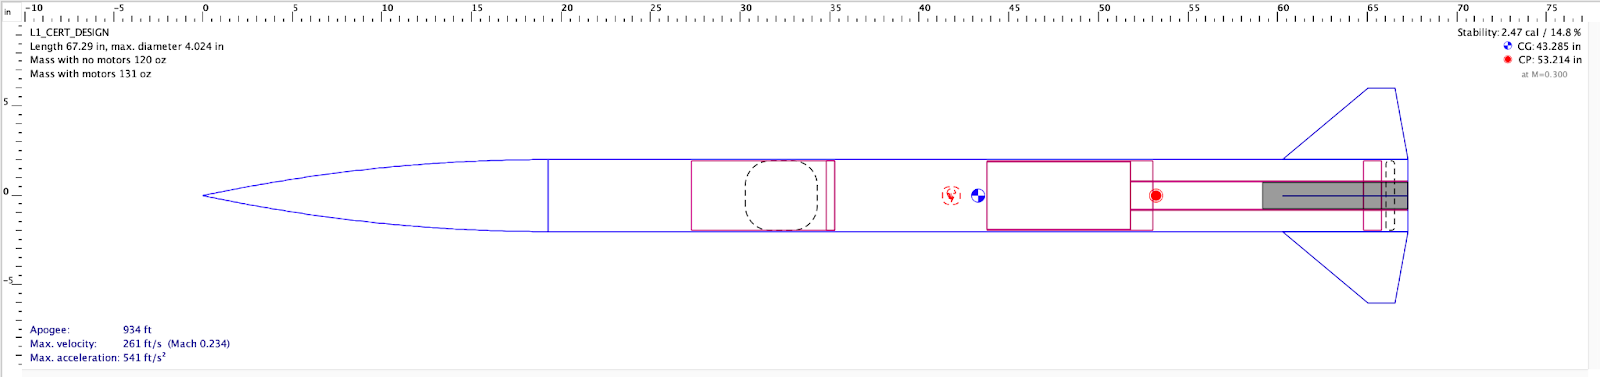
Rocket With Aerotech H550 motor:
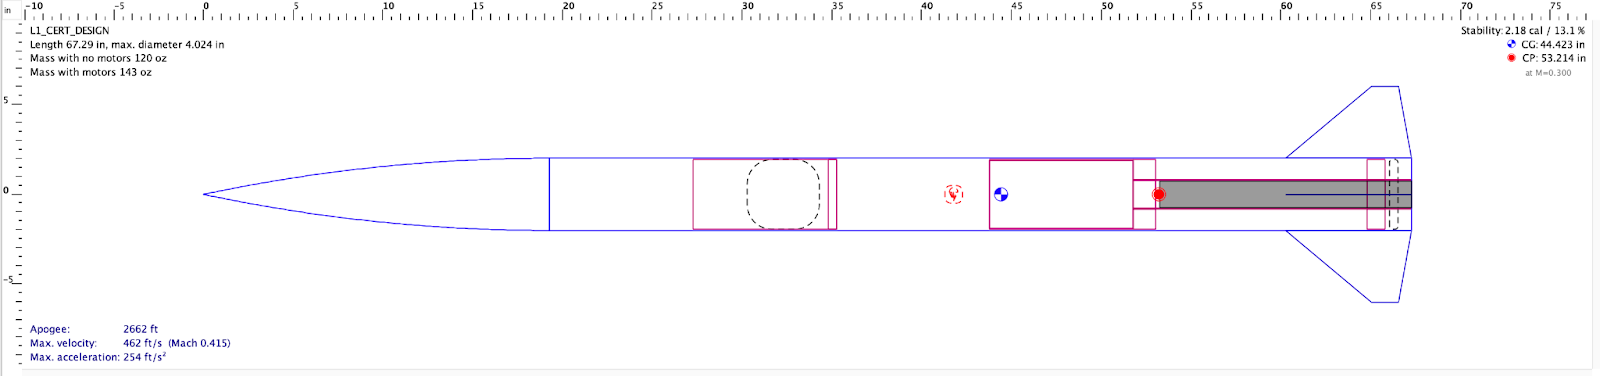
Rocket With Aerotech J270 motor:
The rocket with the H motor had a stability of 2.47 calibers, which creeps into the overstable category. Overstable rockets have a tendency to weathercock (turning into the wind). The simulated landing distance from the launch site at 5 mph winds was 283ft, and since I wasn’t aiming for any altitude goals with this design, so I decided that this would be acceptable for my L1. With a J motor, the stability was 2.18 calibers.
Airframe and nosecone:
I chose to use Blue Tube for my airframe. It’s a spiral-wound vulcanized cellulose fiber tube that’s comparable to a phenolic tube and is much lighter than fiberglass. I purchased a fiberglass nosecone with an aluminum tip from Mach1Rocketry.
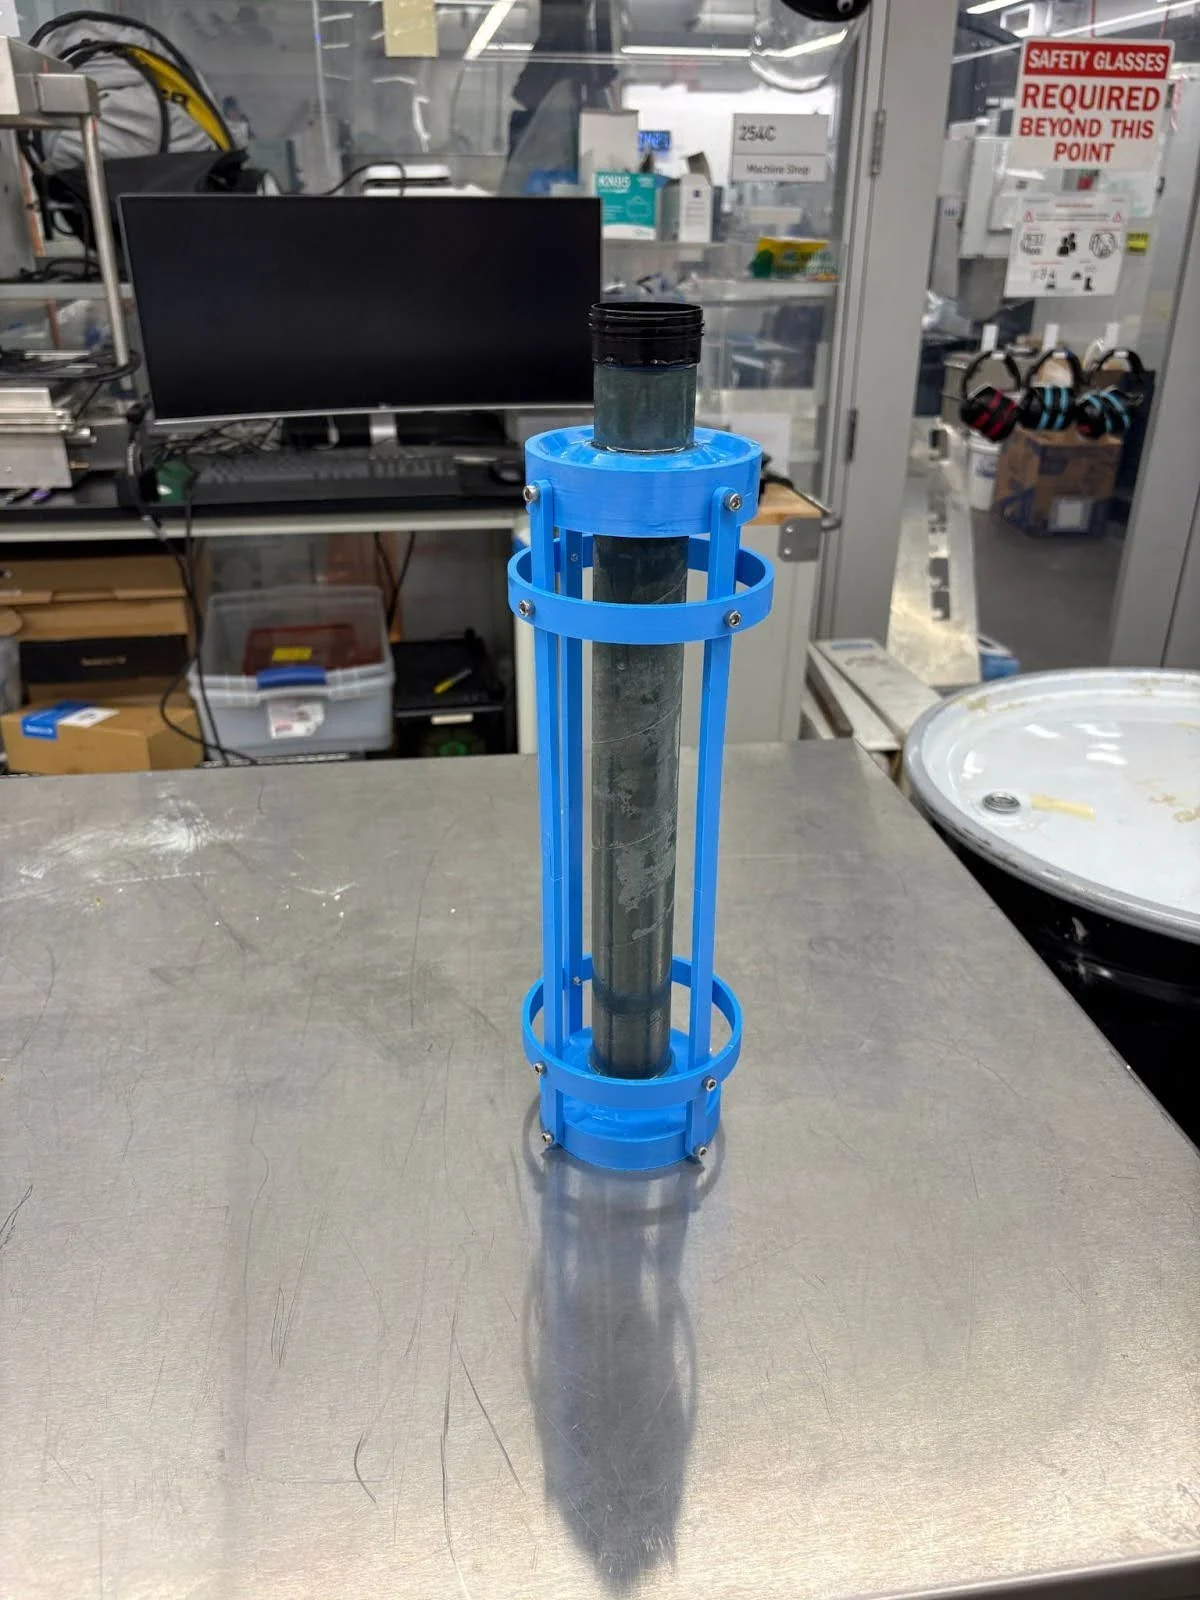
Motor mount:
I used a 38mm blue tube for the motor mount tube and designed my own centering rings in CAD (Fusion). I 3D printed the centering rings out of PLA at 80% infill and assembled my motor mount. I also designed and made a jig to hold my bottom centering ring at the position while the epoxy cured. Initially, I planned on screwing my motor mount into my airframe so that I could swap it out for a 54mm motor mount in case I ever wanted to fly 54mm motors on this rocket, so I had the jig to align the screw hole as well. Ultimately, I elected to epoxy the motor mount into my airframe to be safe.
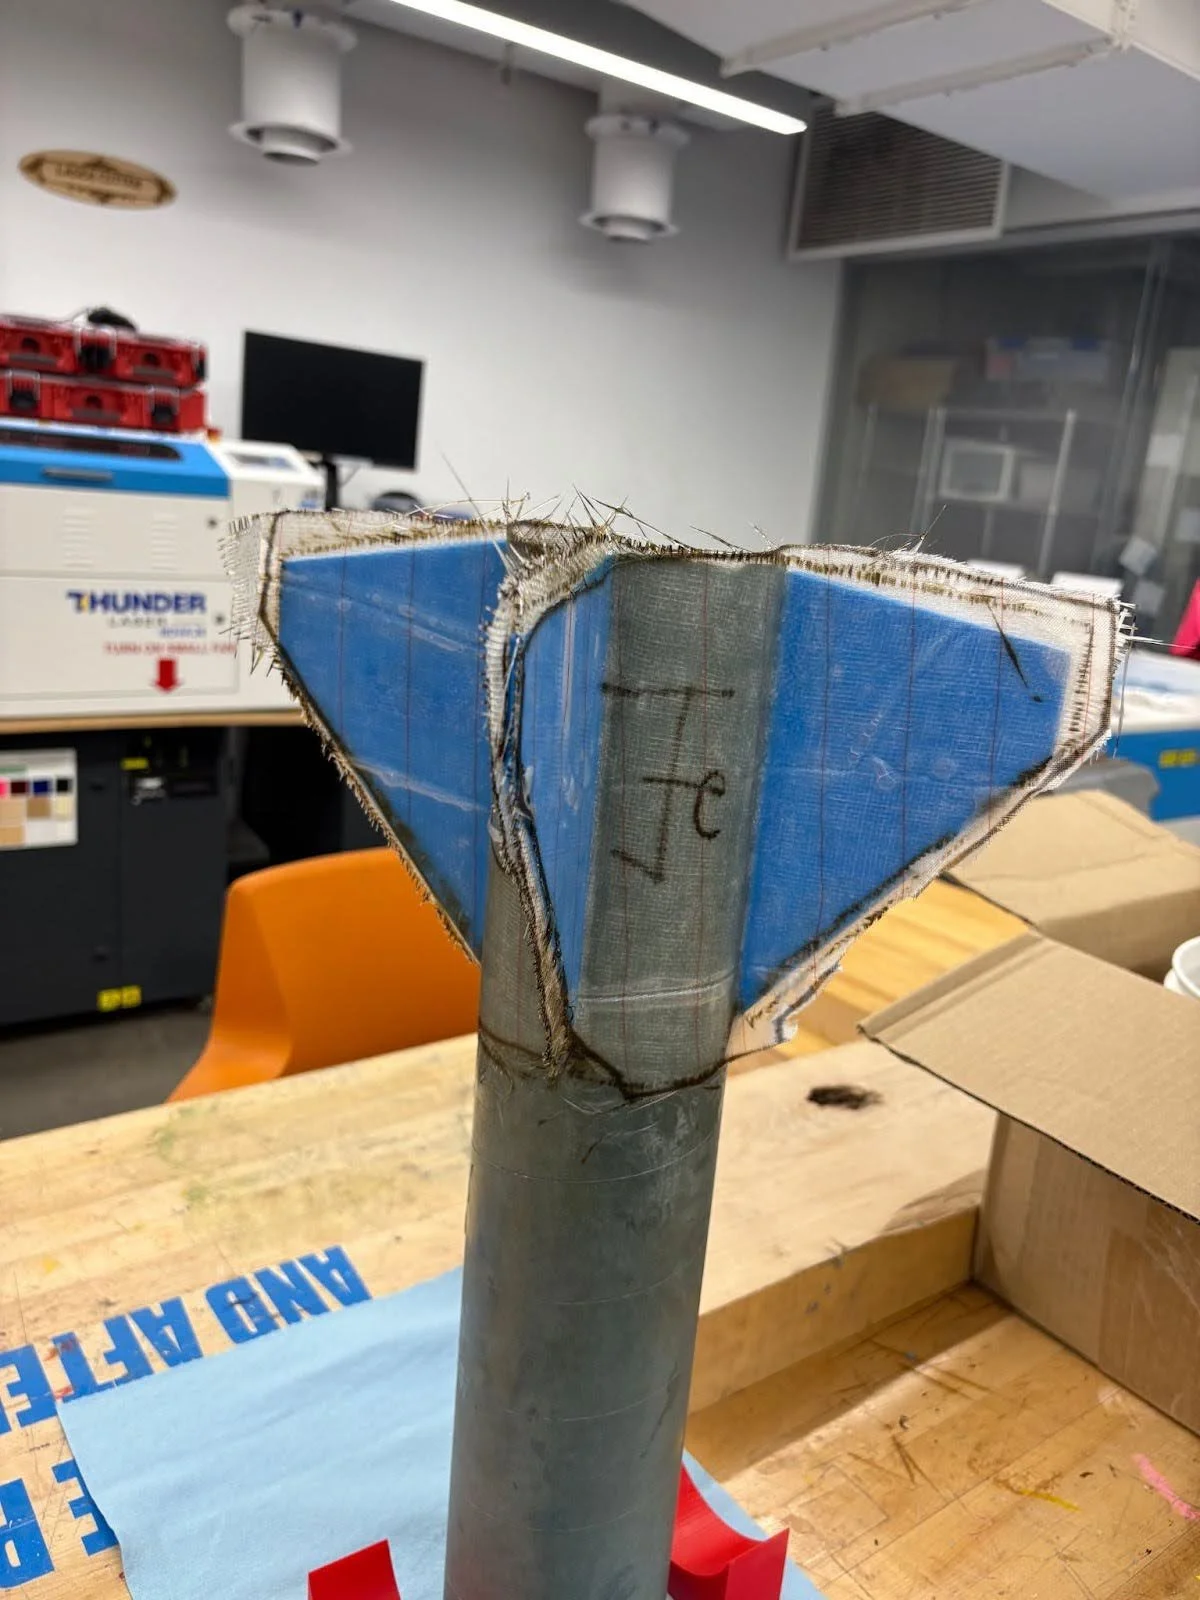
Fins:
I 3d printed the fins out of PETG at 100% infill. I surface-mounted the fins with epoxy utilizing a 3D printed jig I designed. Looking back, I should have paid more attention to my jig design, the fins were secured at the bottom of the jig, but there was a bit too much wiggle at the top.
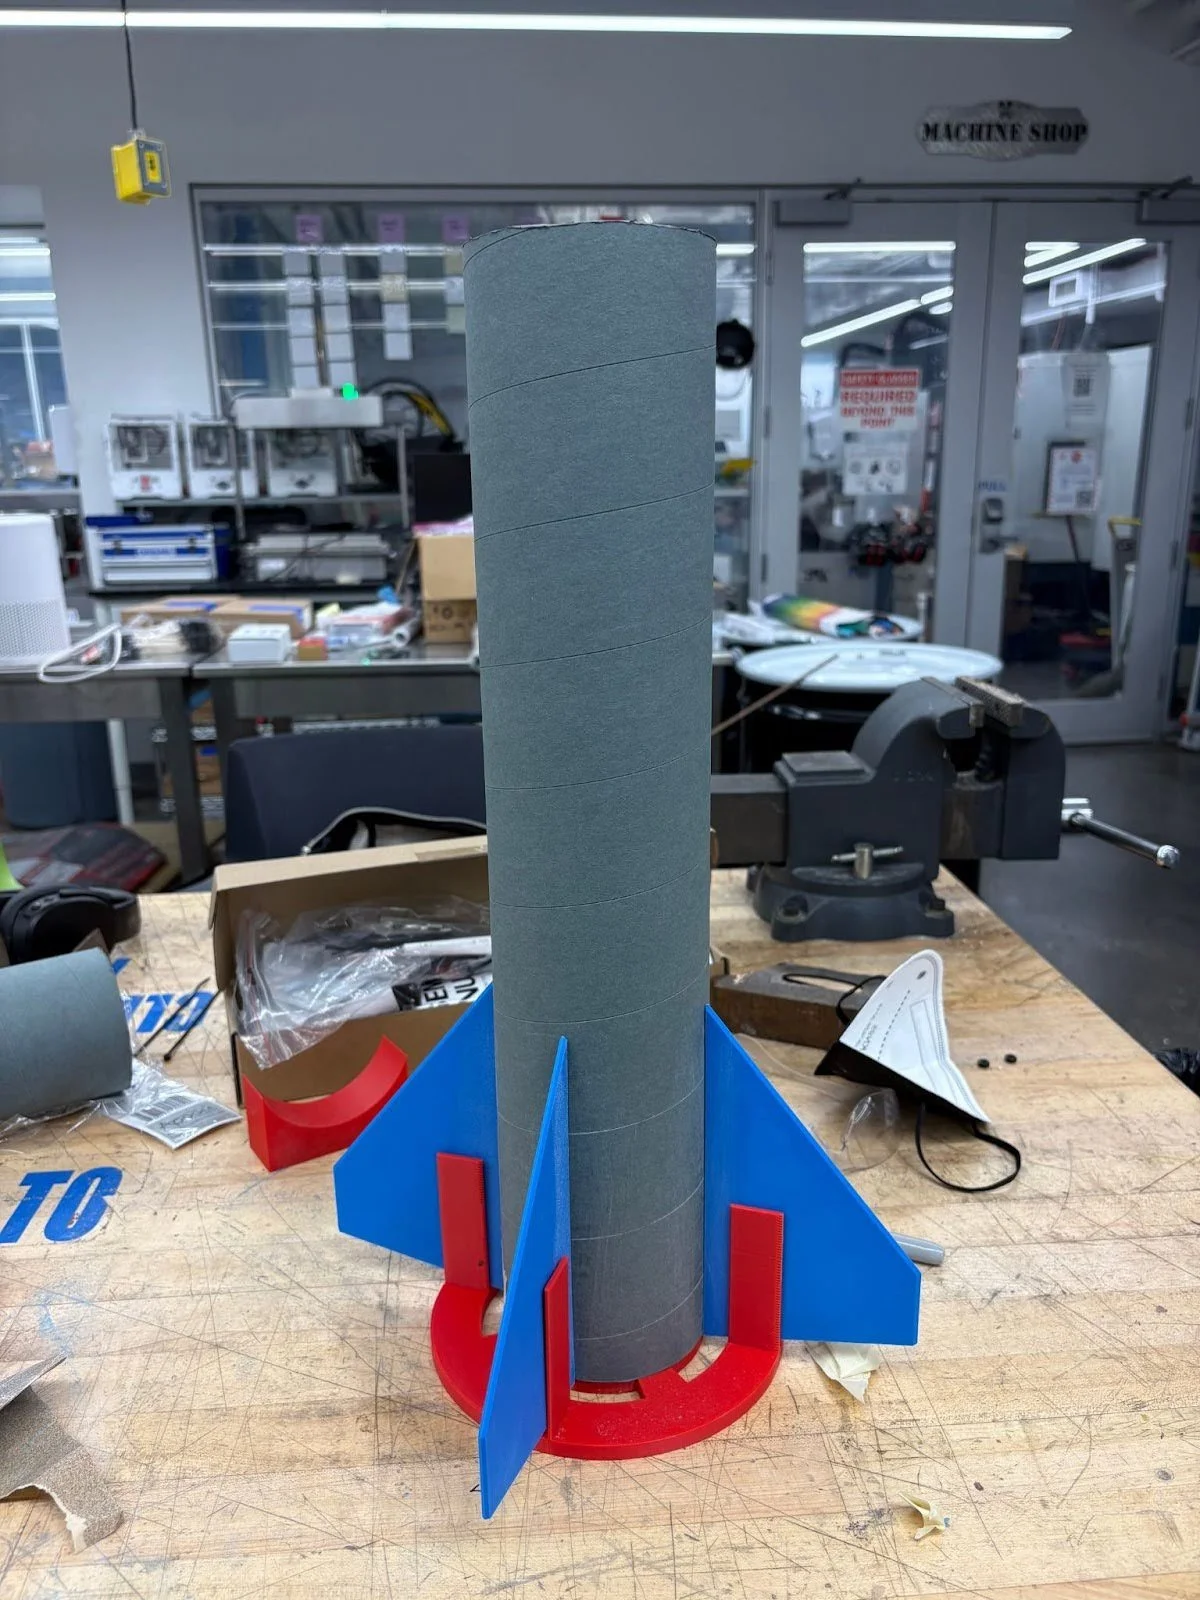
After this, I did a 2-layer fiberglass wet layup with 6 oz/square yard fiberglass cloth and West System 105 epoxy. I made sure to orient the two sheets at a 45-degree angle to maximize strength and laid up the two layers over the course of several days. I made sure to put on a layer of peel ply to help the surface finish. Following this, I cleaned the edges with a Dremel and sanded.
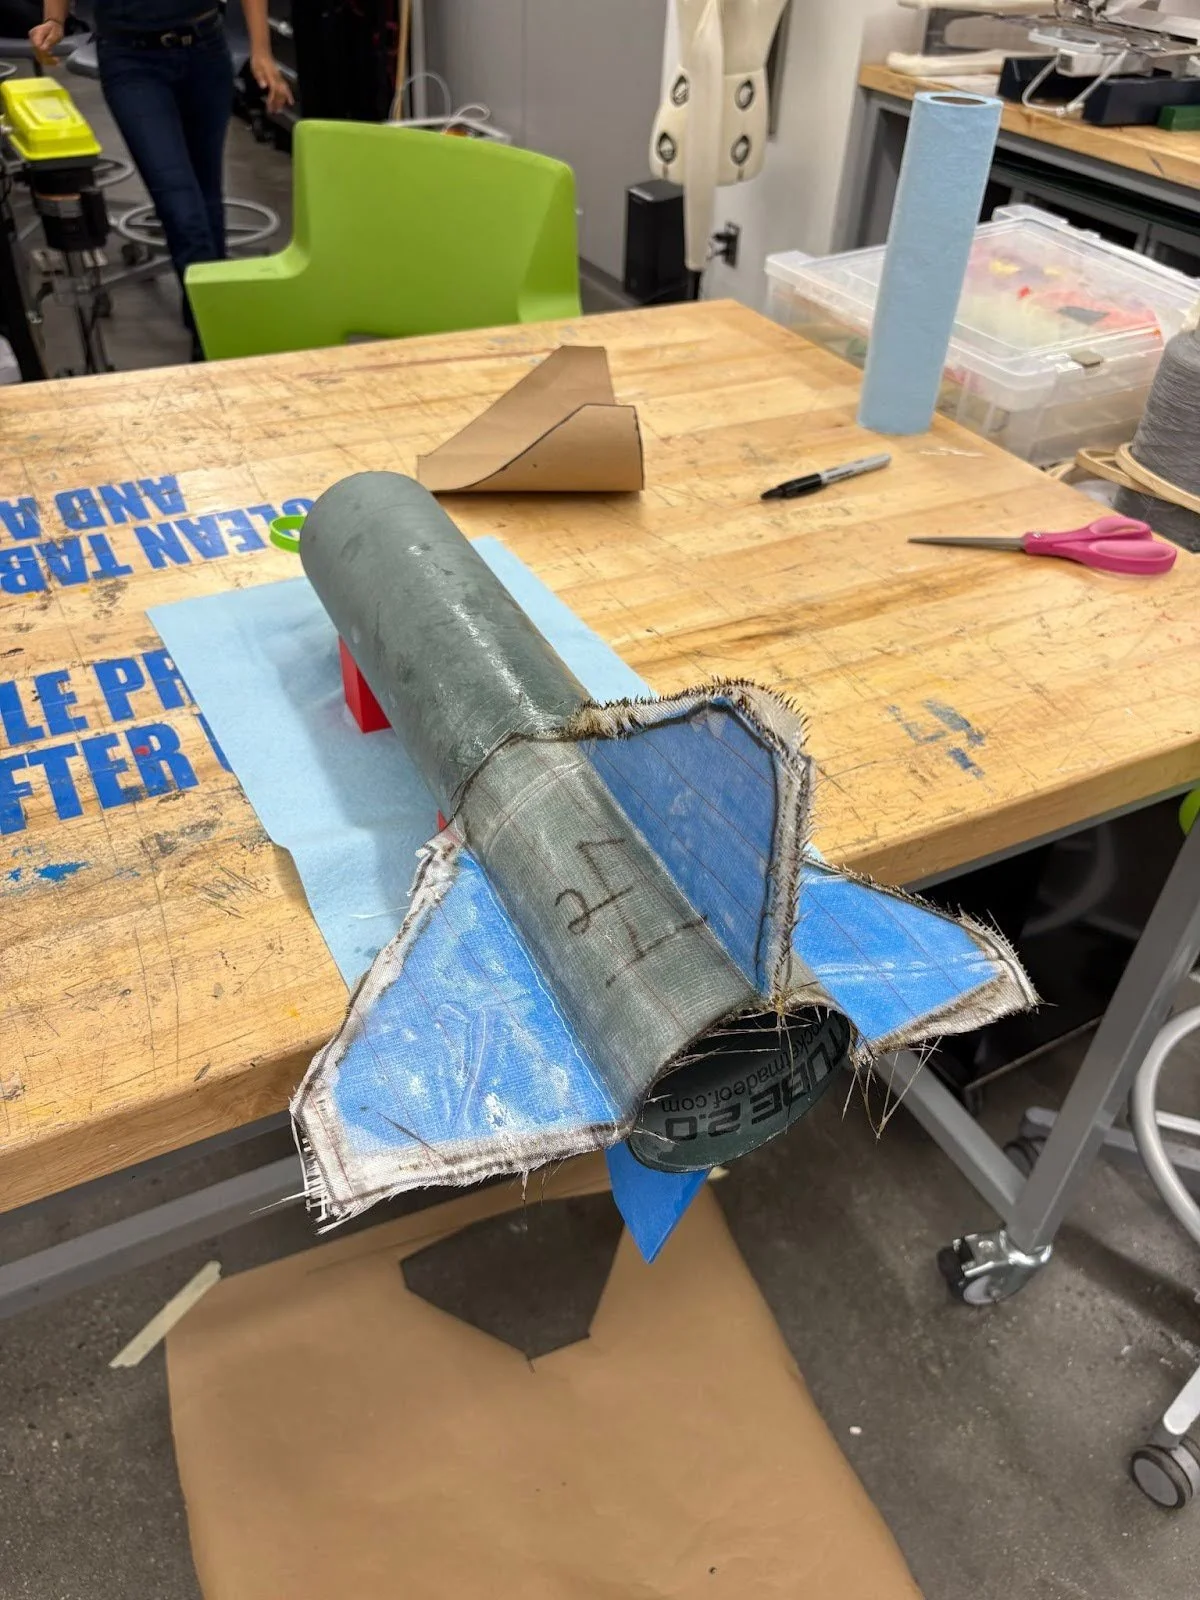
I then epoxied my motor mount in, completing my fin can.
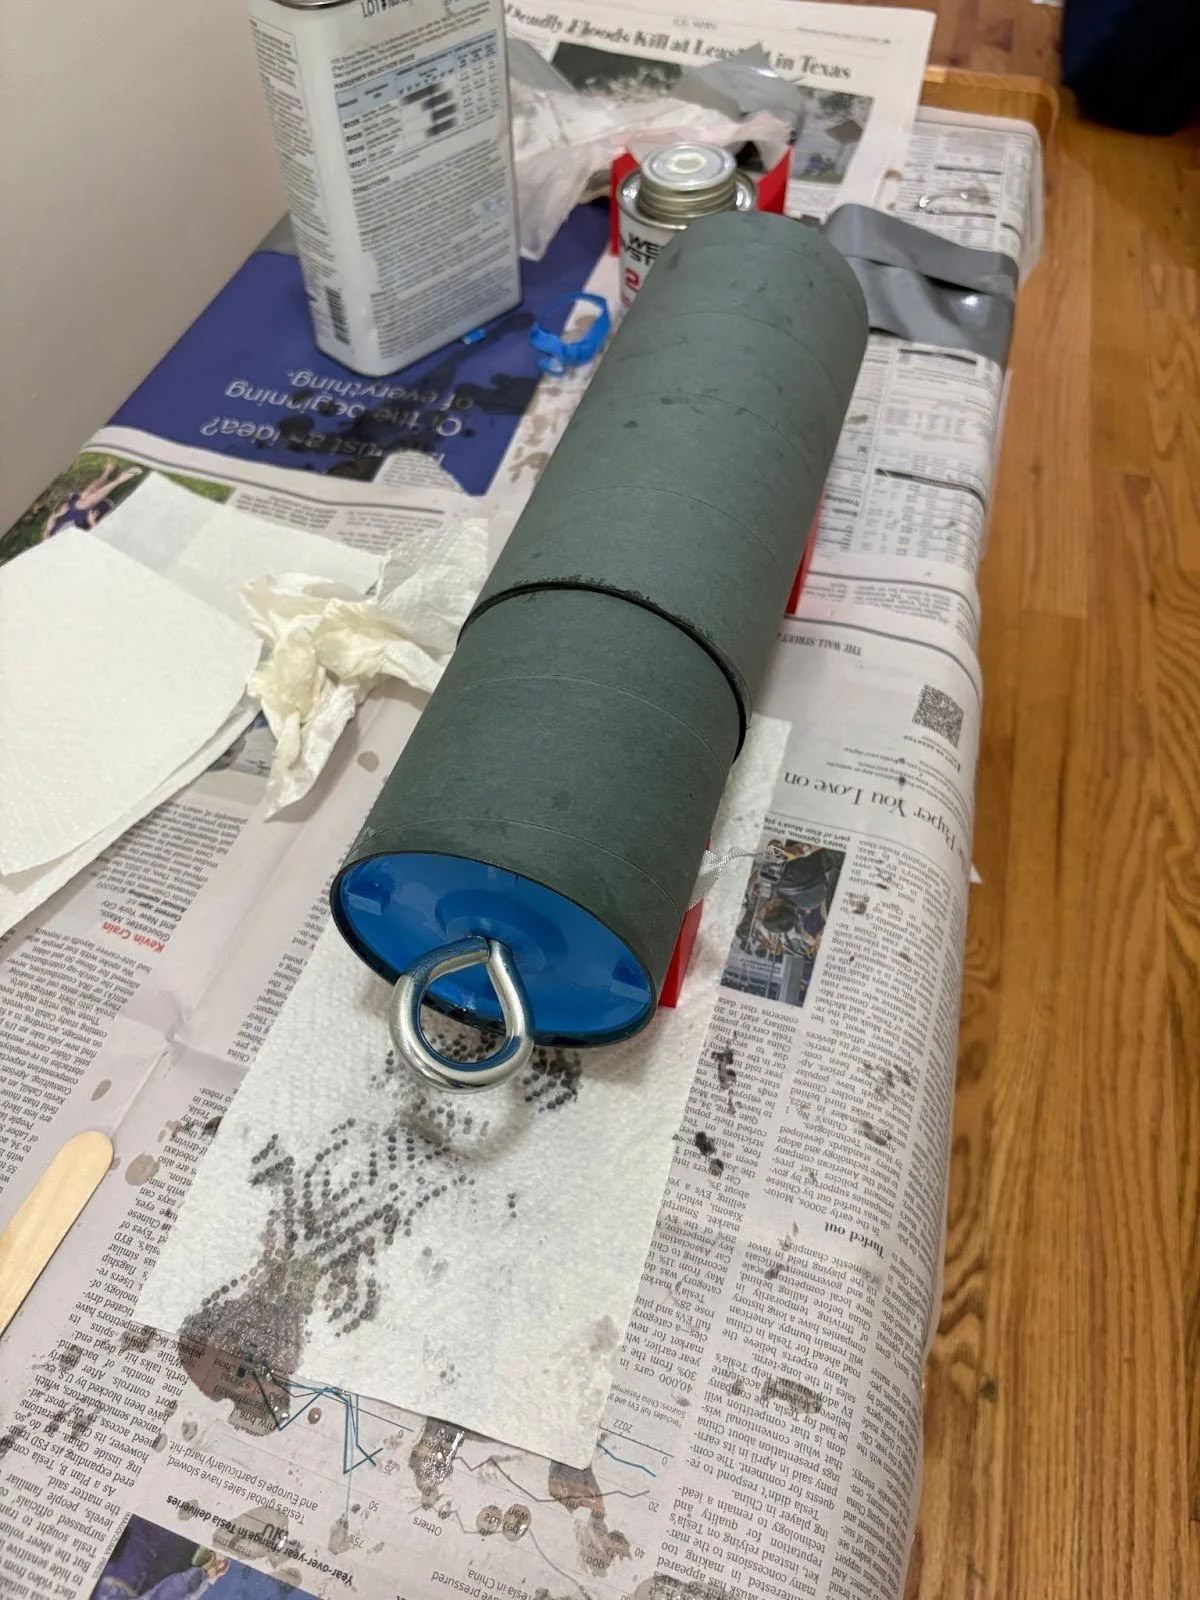
Bulkheads:
I modeled a bulkhead in CAD and 3D printed a bulkhead out of PLA at 80% infill. I put in an eye bolt to tie on the shock chord and parachute. I then epoxied the bulkhead into my upper airframe. The upper section of the airframe integrates with the nosecone and holds all electronics.
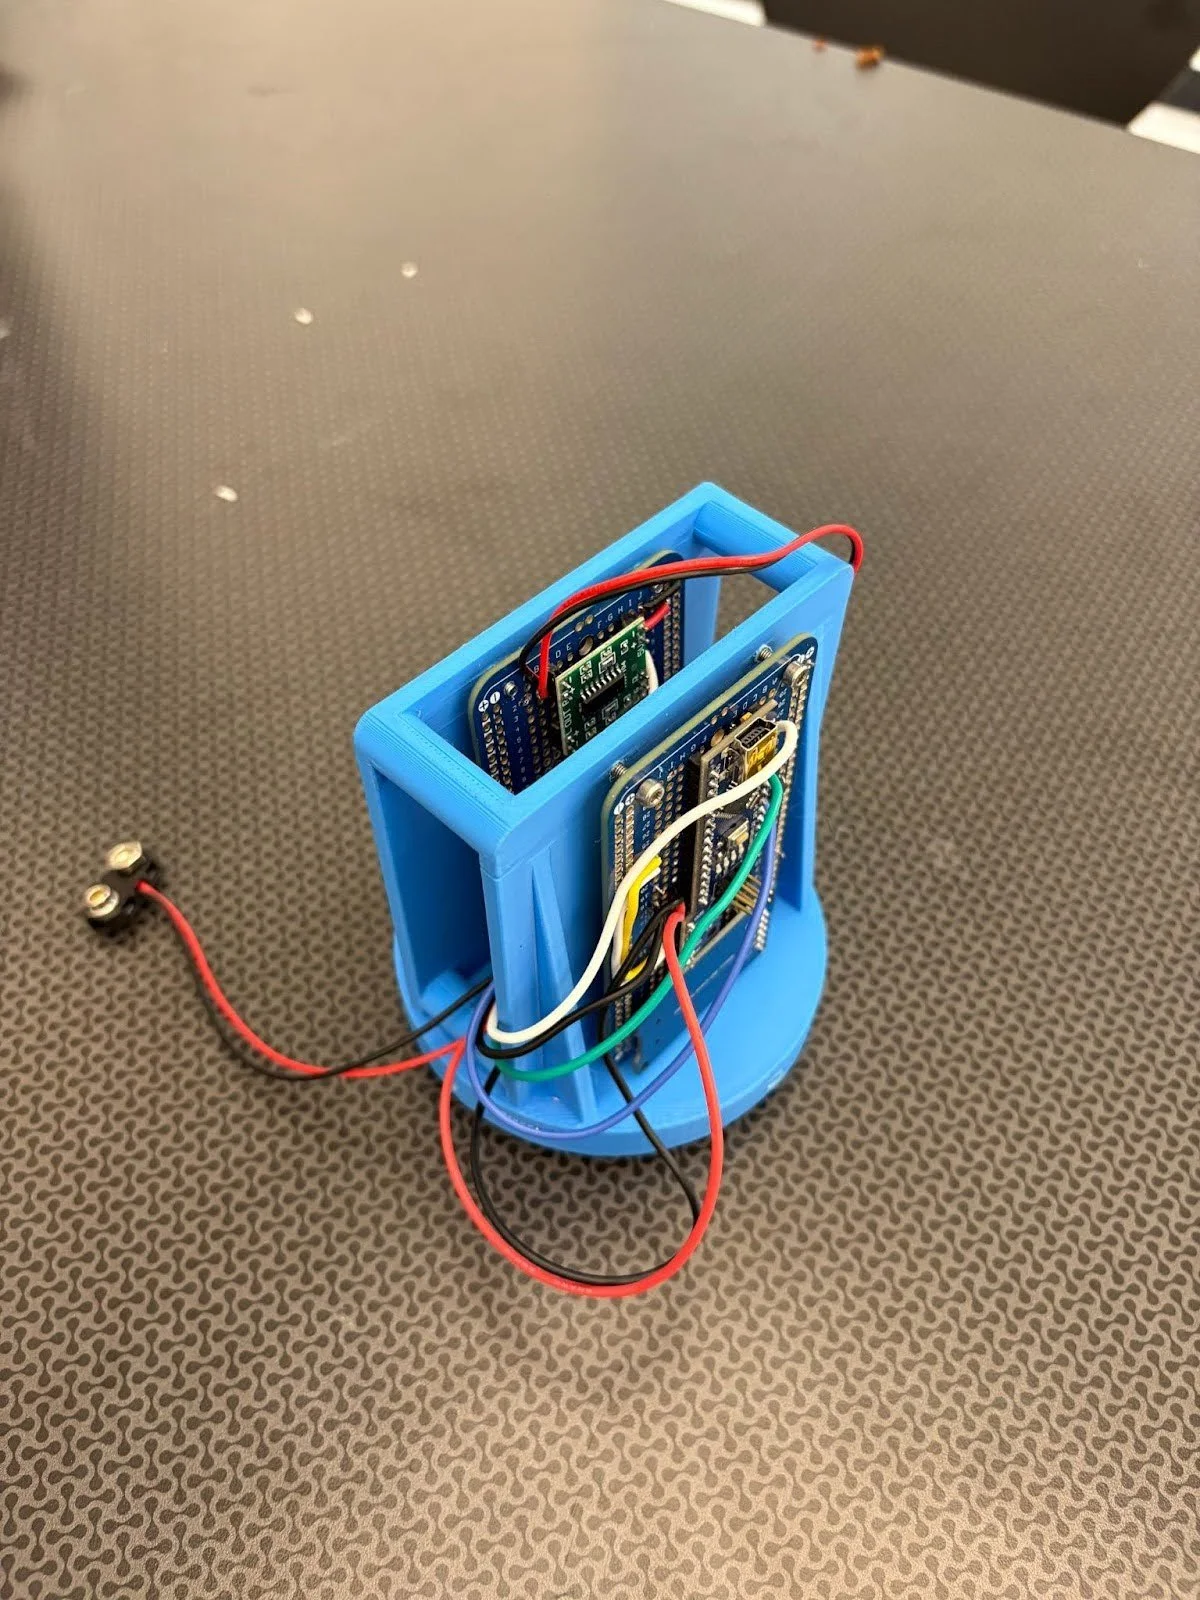
Electronics:
I made a simple flight computer on a perfboard with the following components:
Arduino Nano
BMP280 Altimeter
PAM8403 digital power amplifier
5V buck converter
SD card reader module
3W 8 ohm mini speaker
1200 mAh 9V battery
The computer records altitude data and saves it to a MicroSD card. It also beeps loudly once landed to help me recover the rocket. I wrote the code for the Arduino, designed an electronics bay, and 3D printed it. The electronics bay is mounted to the upper airframe portion with four radial 8-32 screws.

Recovery:
I used Kevlar cord as my shock cord and attached a 58-inch parachute to it protected by a fire blanket. I utilized the ejection charge on the motor with the delay set to 6 seconds.
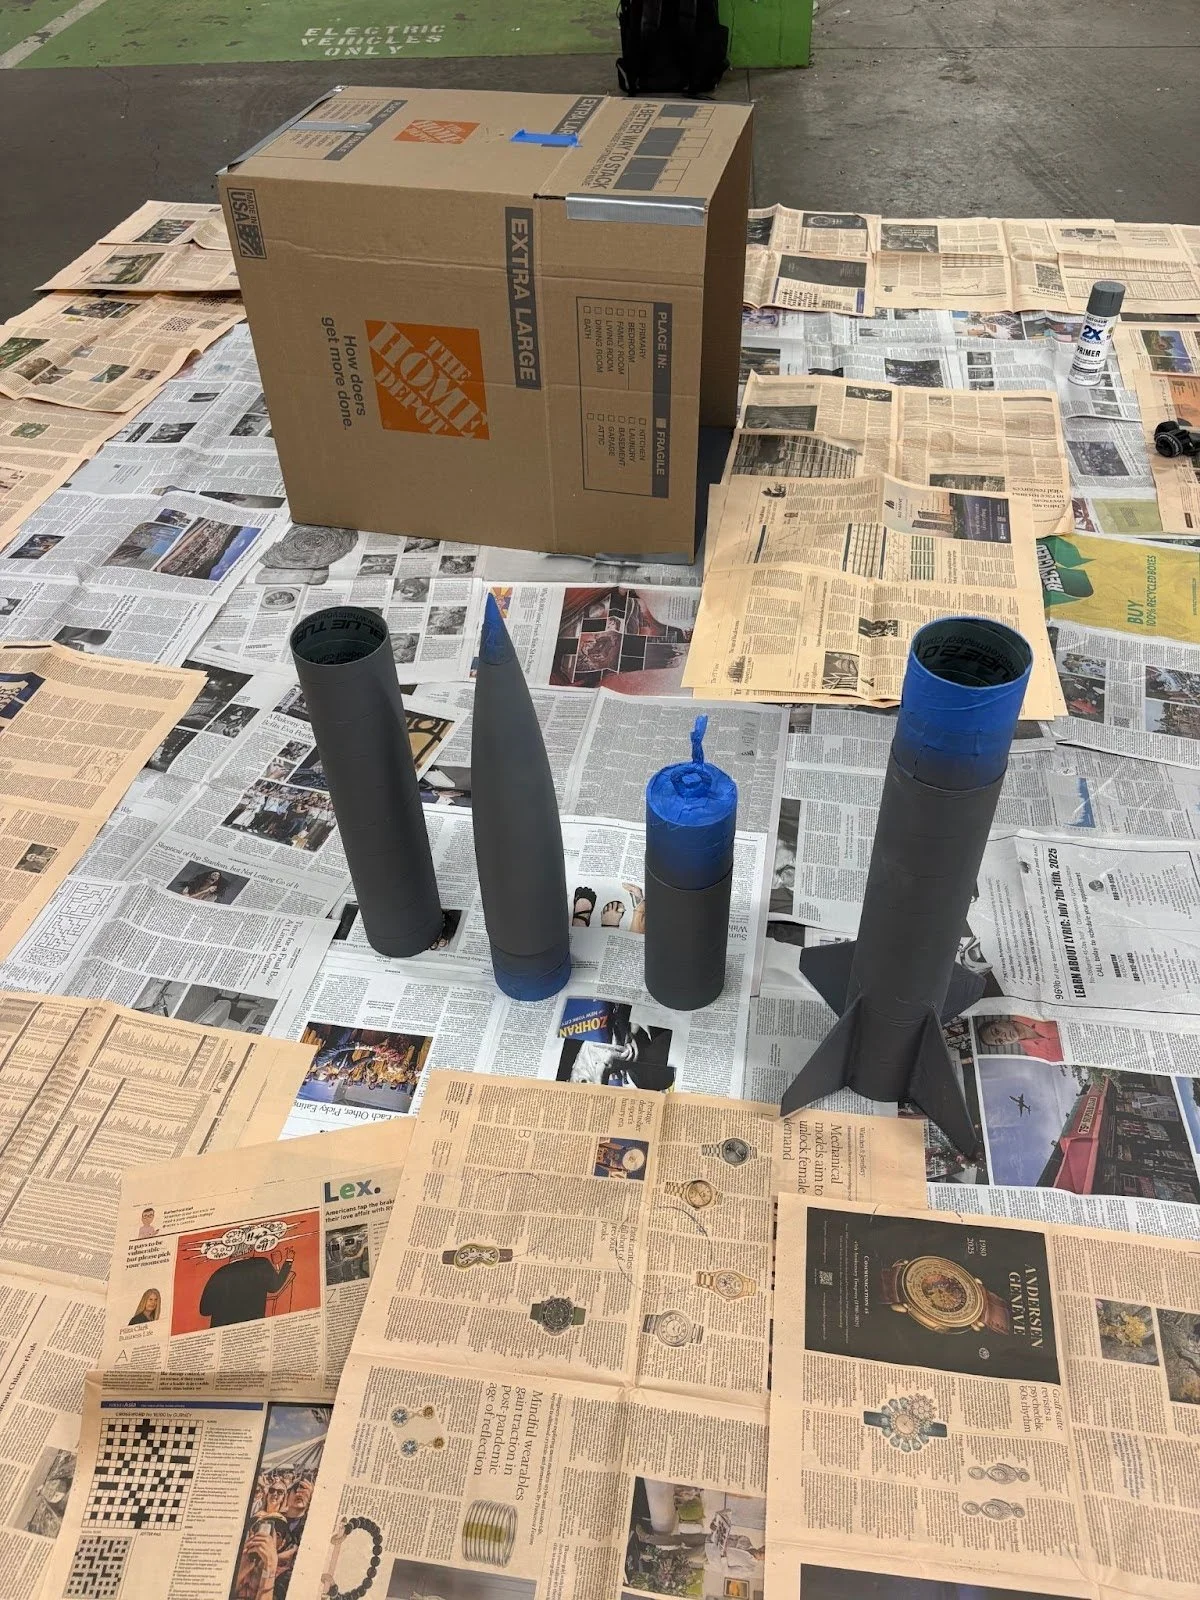
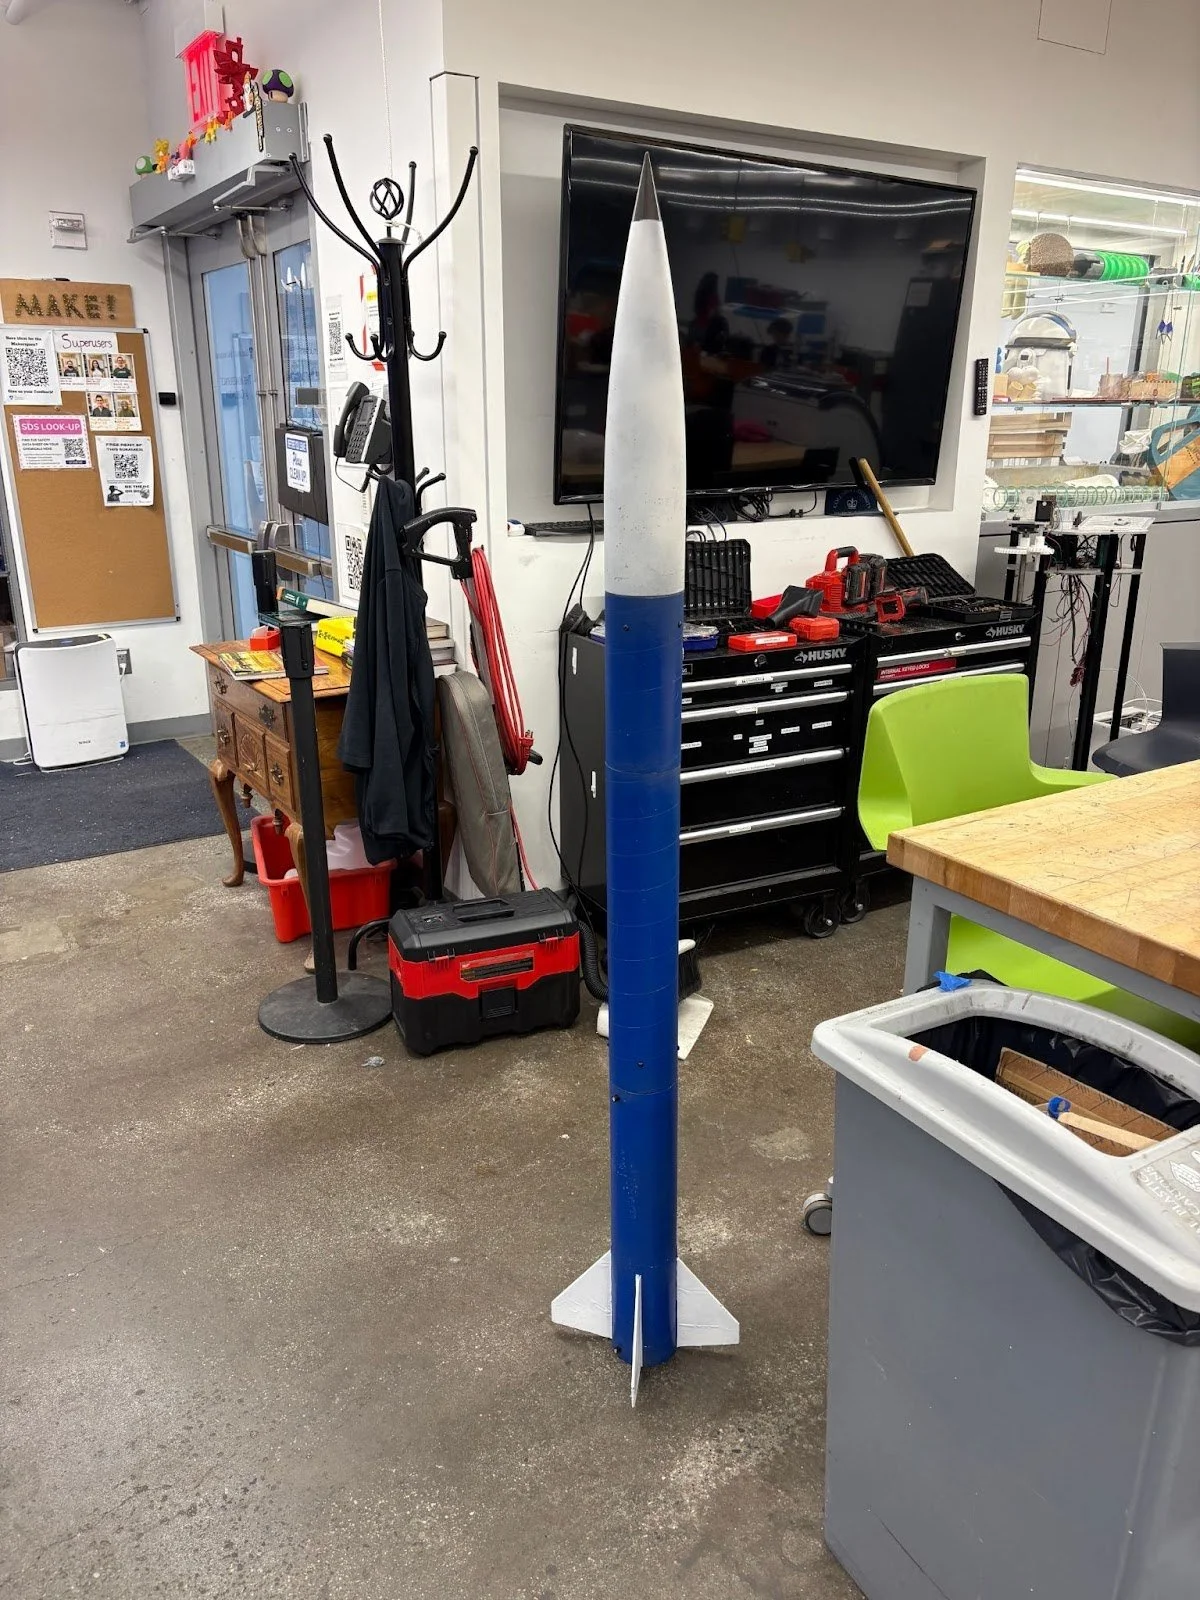
Painting:
I sanded all my components, sprayed on primer, then two layers of spraypaint to get this finish:
Here is the rocket fully assembled:
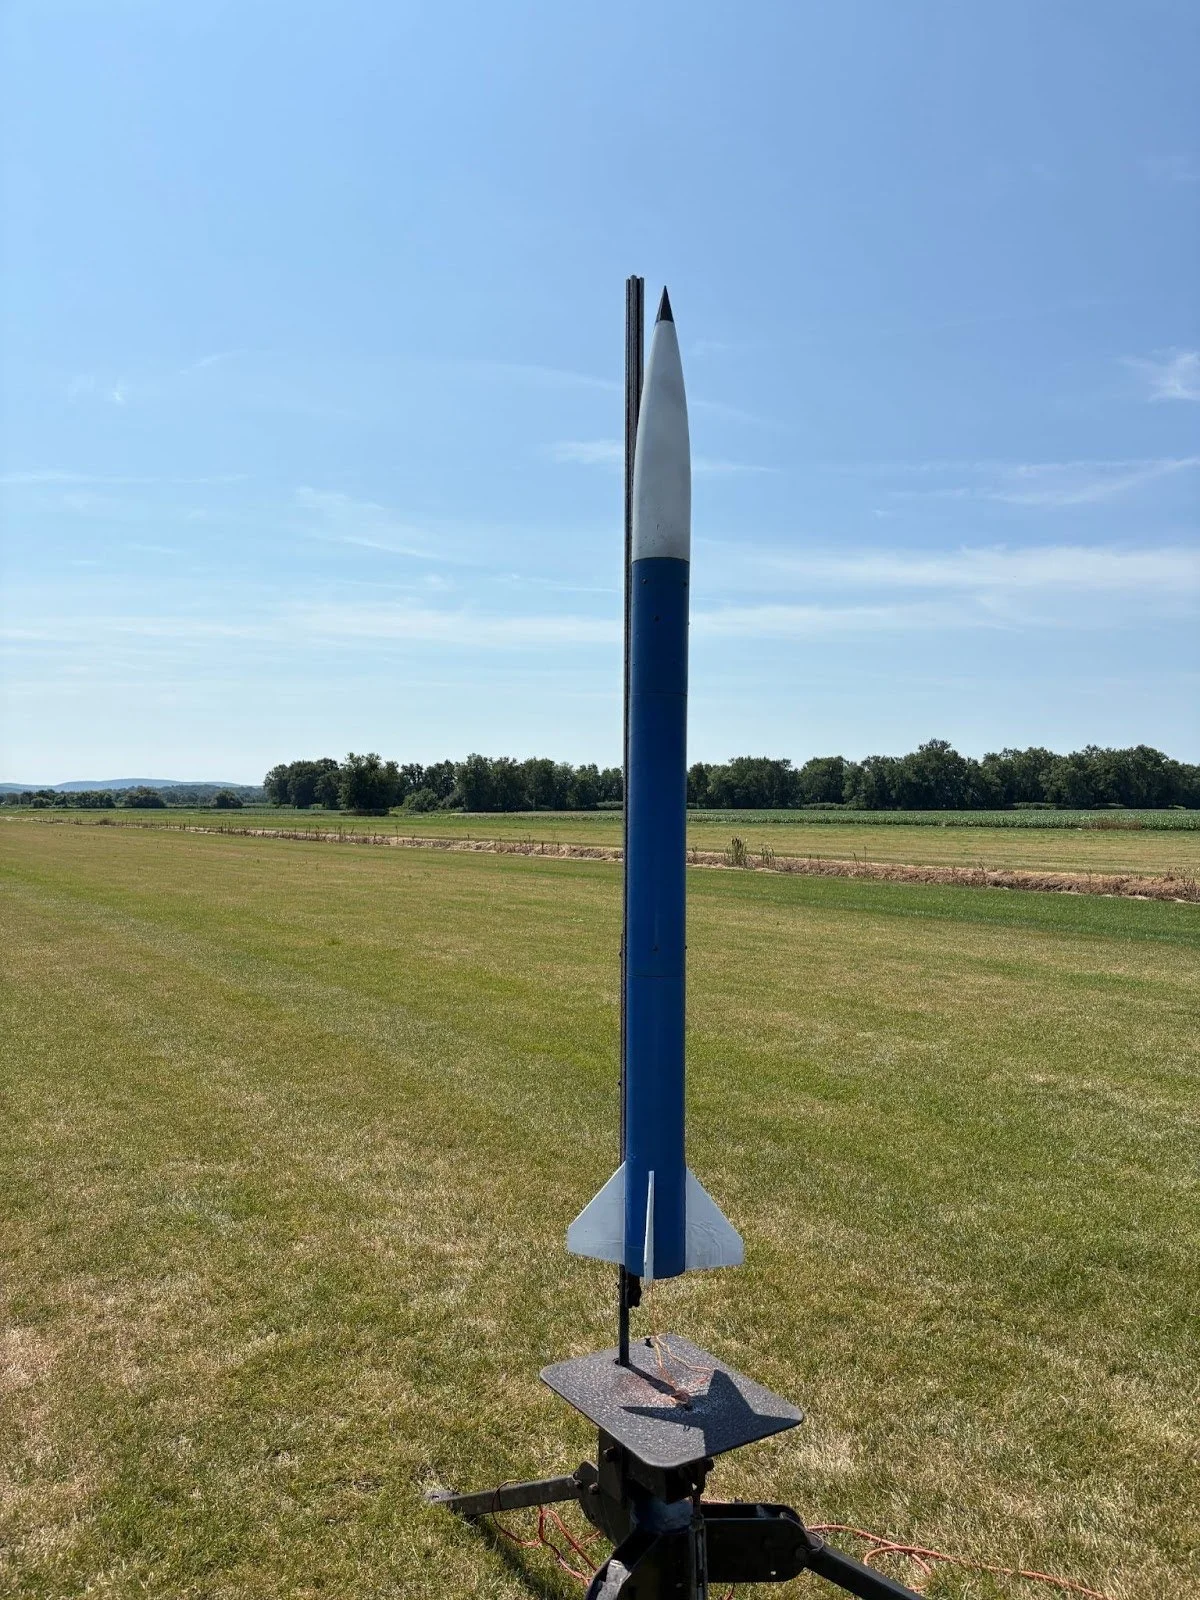

Launch:
I launched with the Metra Rocket Club on a beautiful August afternoon. The rocket hit an apogee of 890 feet and landed about 100 yards away from the launch site.

This project was incredibly fun and a good learning experience in composites and general rocket-building techniques. I’m currently working on my L2, which will use the same fin can and airframe but with new custom electronics and a dual-separation dual deployment parachute recovery system.